I have proposed to make a sort of eternal landscape machine. All of the parts will be laser cut from masonite, printed on my makerbot 3D printer, or repurposed from elsewhere. Here are some images from the proposal and should give the general idea.


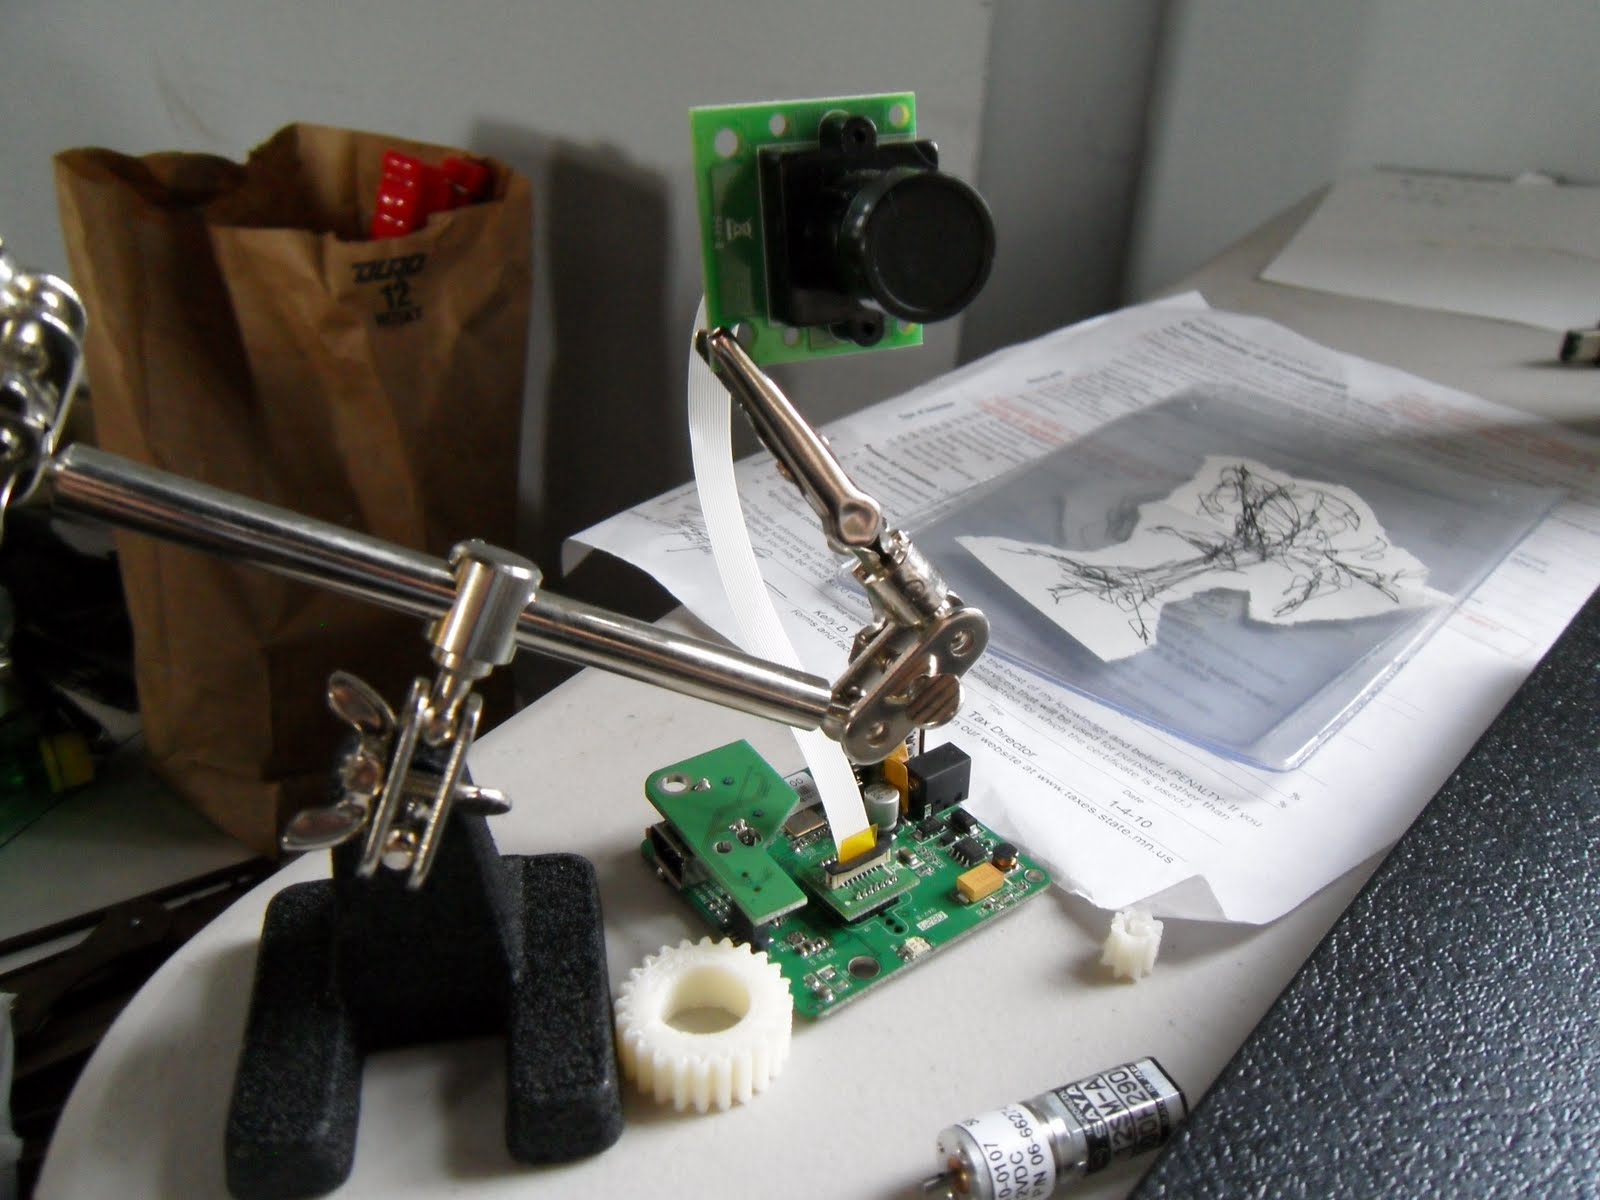
My first task is figuring out scale and mechanics. I am also very interested in making a camera that can rise and fall and pan using a couple servos and a small geared motor for focusing. I am using the unibrain firewire cameras with a breakout imaging sensor so that the majority of the camera can stay out of the way. I am thinking about a 4 arm orbital configuration like the one they use on the force feedback controller Novit Falcon (well they use 6 arms but you get the idea.)

The key is that this holds the camera in a front facing position while it moves up and down.

Second Work Day
I worked out a framework for my track, and did a test print/laser cut. Here are the results before and after assembly.


looks slick but I can see where I have made things to wide and all the slots are too lose as I didn't accommodate for the thickness of the laser.
Day 5 Report:
So I have pinned down the measurements for the slotting on the masonite to get a very secure but non-destructive fit. with this knowledge the whole thing can be glue-less.
I have also made moth of it much smaller/narrower. I am still having issue with the chain as I had hoped to use cold pop rivets, but no matter what I do the chain doesn't move smoothly enuf afterwords. I will try with slitghtly bigger holes and my special spacing tool to see if the combination still might work, otherwise I will just have to buy little nuts and bolts.

I have also printed my first ball and socket joint to test if this methodology will serve my needs for the camera mount. At this small scale it works, but is not all that smooth. While it is easy to sand the ball to a nice smoothness, the socket remains sloppy inside. I also worry that if over cranked the ball simply pops out, and that is not a great situation. Next I will try a universal joint.

I am hard at work now fleshing out all the complex features and parts I need to cut out of the masonite.

Day 9:
Time goes fast and then slow and fast again. The Makerbot has been giving me some troubles with not sticking and so i have an order in to the always great makergear.com people for some of their apparently much better and somehow magical tape? Anyway, I did get one gear printed up successfully, while the second smaller gear leaves something to be desired.

and it will be driven by that little motor which is already 58rpm and I am gearing down again by 3 (8 tooth gear vs 24 teeth for the bigger gear).
You can see it on the lens here:

I have been working in blender to make a casing for the top and bottom parts of the camera, and after spending hours on a very organic style case, I decided apon second glance to go with something a bit simpler.


Of course work continues on the track for the images to hang and move from. I have really grown to appreciate the mental puzzle of crafting these pieces in my head and then having them appear and assembling like so many dinosaur bone puzzeles from the past. I might need to make a few puzzles for nephews and such for christmas. Anyway, I have decided that making my own chain was causing too many unneeded troubles. But since i am not interested in the dirty and heavy bike chain, I am now designing the piece to use ball chain, nice fat special order ball chain. I am afraid that I am leaving MAW with most of the 100ft reel I had them buy, but there are plenty of uses. This eliminates the need for the whole second overhanging track and simplifies many many things for me. My biggest issue at the moment is that I am attempting to make the whole thing without glue and I am getting some variation in the masonite thickness and the laser settings so I am trying to perfect the slot size and such.

Two days until the performance:
So I have been a bit of a flurry here as things come to their make it or break it conclusion. With Ali's help I cut 8 2'x4' sheets of masonite full of parts.


I have started the assembly and it is all starting to come together, slowly. Some of the slots are too tight and others are too loose.

Here you can see the hanging system. The idea is that the ball chain locks in to each carrier and the image packet is suspended below the hanger by the metal clip.

More assembly in progress. Late last night I broke on piece working too hard to get something into a tight slot just 1 more mm. Of course I repaired the damage and had some spare parts, but it was still disappointing to ruin the perfect form.


Here is the giant pile of reject parts and "negatives." Disappointing to have so much waste, but I didn't have time to fully optimize as much as I would have liked.

Here are a couple shots of the camera casing I printed up on my makerbot. I have it all up and operational again, after realizing I was using the 5V plug instead of the 12V one and thus not getting anywhere near the hotness needed. I made the case in three parts and glued them together. The good news is that the mm accuracy seems really tight. I still need a reprint of the second little gear and the back of the case and then can begin on the rest of the armature and such. Things seem to be going well on the big machine at the moment and so i think i can spend tommorow concentrating on the camera and printing all the parts.


Next I glue all the gears together.....

One Day to performance:
So I was up very late trying to make a late night fix to all of the gears. I had not accounted for the fact that my gears have space between them with some randomly placed spacers and the ball chain was cutting straight lines thru these spaces and thus making the chain slack at times and then too taught. I no longer have access to the laser cutter and so had to scavenge thru all of my scraps to finds pieces that I could stack and place in the gap to keep a rounded out chain. Doing so and glueing it all together took nearly 5 hours. Long night after a very frustrating first test.
The next morning I had everything back together and adjusted the chain and have gotten the machine running. Mostly. it looks good and does what i wanted, but it is very choppy and gets gummed up quite often. I have found that a very flat surface is absolutely needed and even then for every rotation of the wheels you need to back up half a notch to jiggle things into place. I believe the real issue is that i did not compute the spacing of the balls in the chain as part of the design, and so it is a bit too loose but doesn't need one full ball removed to tighten it, and even the spacing between the gears does not tightly correlate to that spacing. I am posting the pics and a short video, but still need to finesse it a bit and trying to think of ways to keep things more on track and make the whole piece more reliable. I also need to add a handle and keep working on the camera.


I just had to take a couple pics showing off the little japanese style pin joints I used underneath. There are only a few places on the whole piece where I used glue. I could have figured out more but got a bit rushed. It was an interesting challenge nonetheless.


